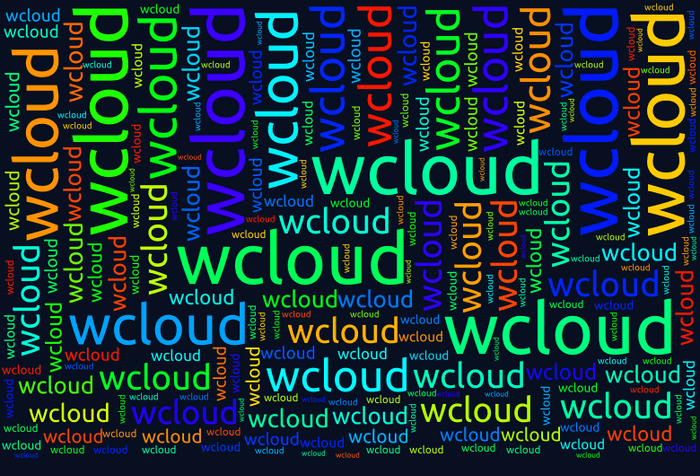
Forming Clouds
While looking through a Discord server I thought it would be interesting to visualize each user's chat history.
After doing a bit of searching I came across the Python wordcloud package by Andreas Mueller. It produced great looking wordclouds and the masking feature was useful to provide a bit of personalization to each wordcloud.
I was curious about how it all worked, and had recently started learning Rust, so I thought a Rust reimplementation would be pretty cool.
The result is my project wcloud.
How are wordclouds made?
The process can be broken down into a few steps:
- Splitting the text into unique words (tokenization)
- Calculating the frequency at which each word appears in the text
- Placing each word without overlap, and with a font size relative to its frequency
Splitting text into words and frequencies
To break the text into words, a simple Regex is applied:
let regex = Regex::new("\\w[\\w']*")
  .expect("Unable to compile tokenization regex");
let text = "The Matrix is a system, Neo.";

let words: Vec<String> = regex
    .find_iter(text)
    .map(|word| word.as_str().to_owned())
    .collect();

assert_eq!(words, ["The", "Matrix", "is", "a", "system", "Neo"]);
The regex is specific to English by default and has to be altered to match what a word is in different target languages.
In addition to the word regex, there are a few other tokenization-related properties that the library lets you customize:
max_words— the number of words to keep after sorting by frequencyrepeat— recycle and repeatedly place words untilmax_wordsis reachedmin_word_length— the minimum length of a wordexclude_numbers— whether numbers should be excluded
Each of these properties can make a pretty big difference to the wordcloud produced.
Common casing
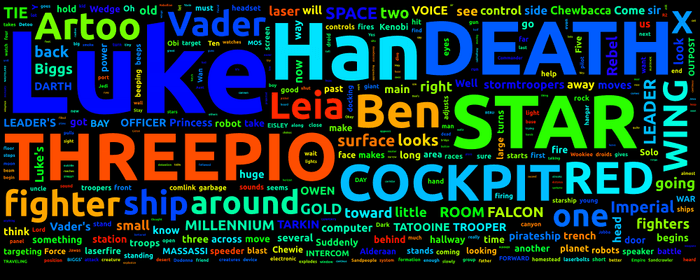
What happens when there are instances of the same word with different letter casings in the text? In the Star Wars script used to generate the wordcloud at the top of this post, LUKE (all uppercase) is used to denote Luke Skywalker's dialogue, and Luke (title case) is used in all other cases.
To get a better idea of frequency, the counts from each differently-cased word are summed and only the most common one is kept.
type CaseCounts<'a> = HashMap<&'a str, usize>;

let map = HashMap::from([
    ("LUKE", 252),
    ("Luke", 422),
    ("Rebel", 60),
    ("Han", 264),
    ("REBEL", 10),
]);

let mut common_cases = HashMap::<String, CaseCounts>::new();
for (word, count) in map {
    common_cases
        .entry(word.to_lowercase())
        .or_default()
        .insert(word, count);

}
Result:
{
    "luke": {"Luke": 422, "LUKE": 252},
    "han": {"Han": 264},
    "rebel": {"REBEL": 10, "Rebel": 60}
}
The above code goes through each (word, count) pair in the map and collects every instance of the same word using the lowercase version as a key.
Next, the casings under each key are sorted by count then alphabetically. Since different casings of a single word will count towards its total, the count of the chosen case is the sum of all cases.
let result: HashMap<&str, usize> = common_cases.values().map(|val| {
    let mut most_common_case: Vec<_> = val.iter().map(|(case_key, case_val)| {
        (*case_key, *case_val)
    }).collect();

    most_common_case.sort_by(|a, b| {
        // sort by occurrence count if different
        if a.1 != b.1 {
            (b.1).partial_cmp(&a.1).unwrap()
        }
        // otherwise, sort alphabetically on the words themselves
        else {
            (b.0).partial_cmp(a.0).unwrap()
        }
    });

    let occurrence_sum = val.values().sum();

    (most_common_case.first().unwrap().0, occurrence_sum)
}).collect();
Result:
{"Luke": 674, "Rebel": 70, "Han": 264}The difference:
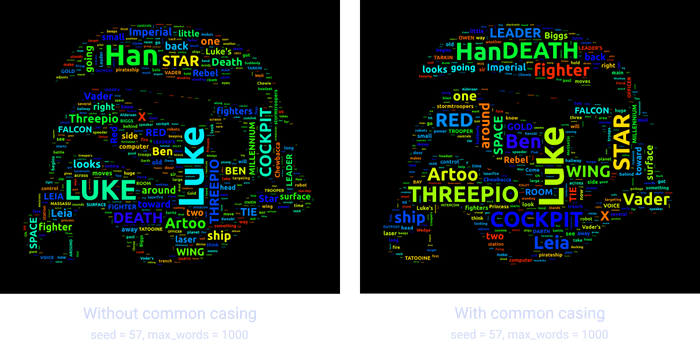
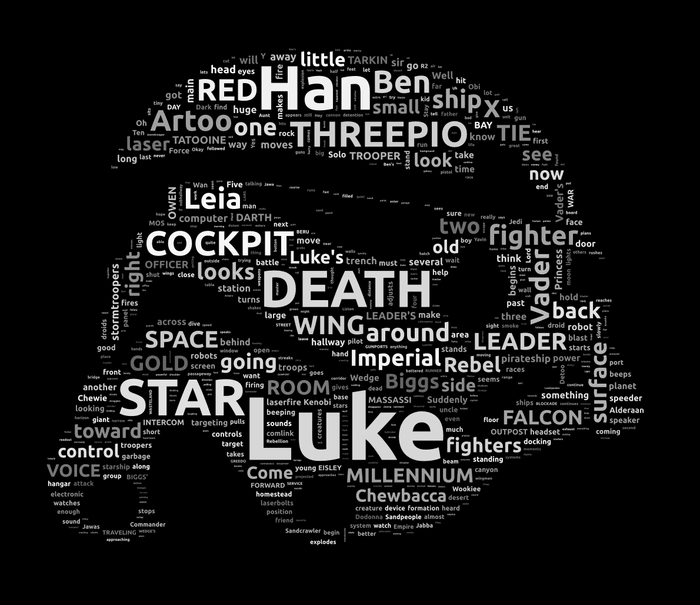
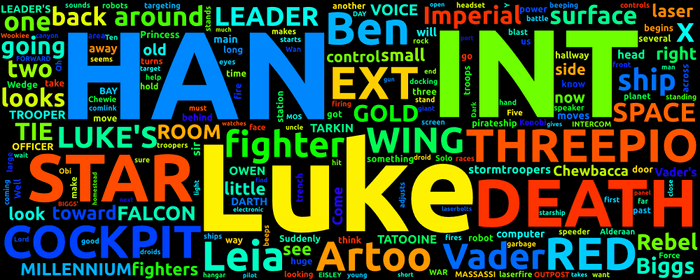
In the wordcloud without common-casing we can see duplicates for pretty much every movie character throughout the script, as well as other common words that have an uppercase variant: Luke and LUKE, Leia and LEIA, Death and DEATH, etc. There are over 400 duplicates in the script that take space away from more interesting words that could be placed instead. In the common-cased version, we get a much clearer view of important words like Vader, Artoo, BEN, and THREEPIO.
Placing words
First approach
An initial approach to placing words could be rasterizing each one at a specified font size, taking the resulting bounding rectangle dimensions, checking every point in the image to see if it overlaps any existing words, and placing it if not.
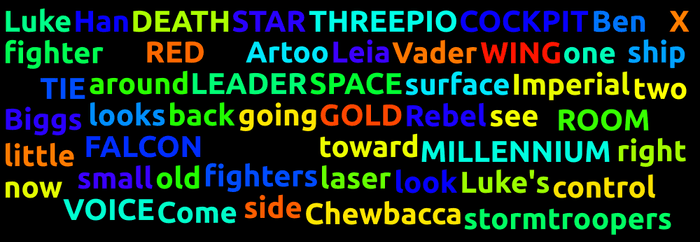
Because the program just chooses the first available spot going left to right, there ends up being spaces where it looks like a word should fit. We could add more margin to each word so that they're more consistently placed, but this approach isn't very visually appealing anyway.
Scaling words relative to their frequency
Rather than specifying a static font size that each word uses, we can make it so that font sizes are relative to the frequency a word shows up in the text instead. The most frequent word gets 100% of the initial font size. Every word placed after that has a font size relative to that.
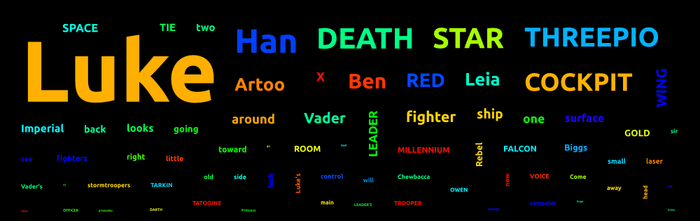
We're now able to see which words are more frequent than others, but it still doesn't look great. Because Luke appears in the script so often, most other words are tiny in comparison.
Both wcloud and the Python word_cloud use a combination of these approaches.
Combined approach
First, we determine an appropriate font size to start with based on the height of the canvas. Rasterizing the first word in the sorted list at a font size of 95% the canvas height produces a bounding rectangle we can use as a heuristic.
// `words` is a Vec<&str, f32>
let first_word = words.first()
    .expect("There are no words!");

let mut font_size = {
    let glyphs = text::text_to_glyphs(
        first_word.0,
        &self.font,
        PxScale::from(gray_buffer.height() as f32 * 0.95)
    );

    let rect = sat::Rect {
        width: glyphs.width + self.word_margin,
        height: glyphs.height + self.word_margin
    };

    let height_ratio = rect.height as f32 / rect.width as f32;

    let start_height = gray_buffer.width() as f32 * height_ratio;
    self.max_font_size.map_or_else(||
        start_height,
        |max_font_size| start_height.min(max_font_size)
    )
};
Next, we search for a spot to place the text. If there is a space that it fits, the word is placed. If not, the font size is decreased (by --font-step) and the search continues. This means that if there is a particularly difficult word to place (e.x. a long word with a large bounding rectangle), other words can be penalized on font size while looking for a spot where it fits. You can still tell which words appear more frequently than others because more frequent words are placed first.
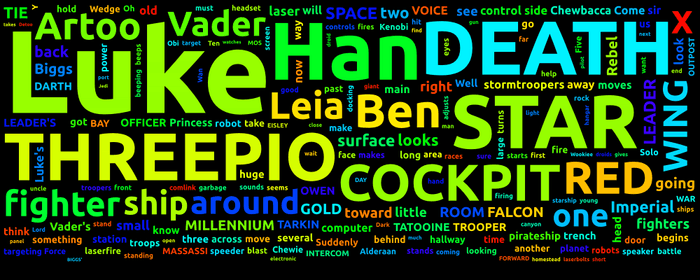
Much better. Because the font size decreases over time rather than being completely dependent on frequency, much of the empty space from the previous approach is filled in. The sizing relative to frequency is sort of naturally kept since the list of words is sorted by frequency. Frequent words start with a larger font size and have more space since there are fewer words on the canvas while they are being placed.
Repeating words
There are still a few empty spaces that we could fill in. wcloud offers three options to solve this: increase --max-words, enable the --repeat flag, or both.
The repeat flag simply cycles over the list of words until max_words is reached.
If there aren't many unique words in your text, --repeat is the way to go.
Adding randomness
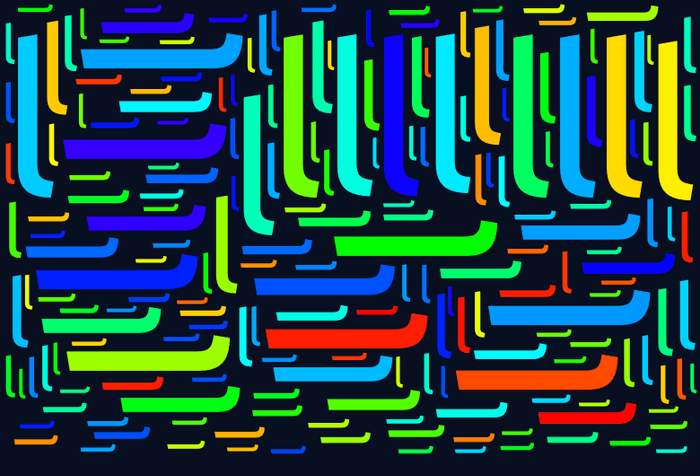
A pattern we've been seeing since implementing relative font scaling is that larger words tend to be grouped at the top of the image. This is happening because when we search for a spot for a new word, we always start at the top left of the canvas and work our way to the right and down.
Because of this, we end up with a sort of movie poster effect. This might be what you want, but it wasn't what I wanted, so I pressed on.
To fix this we can find every spot where a word fits and choose one at random:
let max_x = image_width - rect_width;
let max_y = image_height - rect_height;

let mut available_points = Vec::new();

for y in 0..max_y {
    for x in 0..max_x {
        if region_is_empty(image, x, y, rect_width, rect_height) {
            available_points.push((x, y));
        }
    }
}

let random_point = available_points.choose(rng).map(|(x, y)| {
    Point { x: *x, y: *y }
});
Now, instead of using the first available space, we keep track of every space the word can fit and choose one at random.
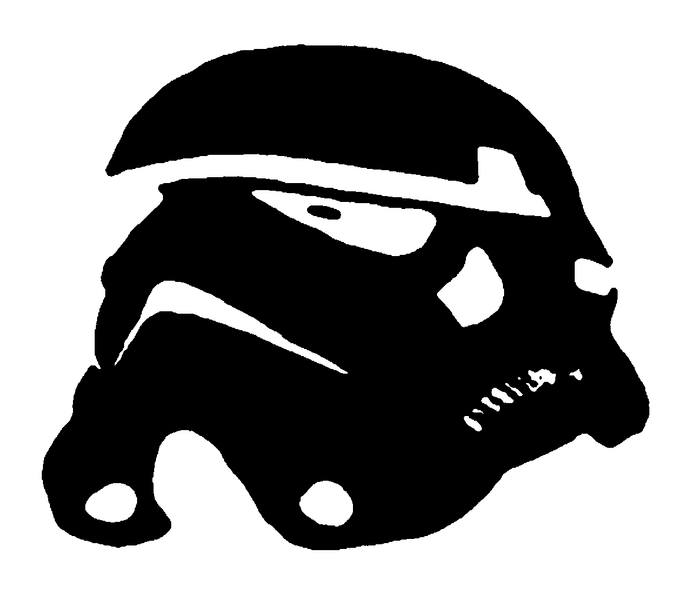
This works fine, but we can be a little more space-efficient than creating million-element vectors every time a word is placed. The Stormtrooper mask used throughout this post has a resolution of 1190x1028. Placing an example word with a bounding rectangle of 600x200 leaves 1,103,320 positions to consider. In order to keep track of every position this word can fit so we can choose one at random, we would need a vector with over a million (x, y) elements.
Note: This next implementation was mostly for curiosity and the fun of learning a new algorithm. On modern hardware, creating a vector with millions of elements isn't actually much of a problem, especially when each element is just a tuple of u32s. I've tested the vector approach and the performance difference between it and the current implementation in wcloud isn't as dramatic as you might think. Could this be a case of premature optimization? Maybe No.
The Python word_cloud project solves this by running the space-finding algorithm twice. The first run counts how many available spaces there are, while the second stops at a random number between 0 and available_spaces.
# count how many possible locations
for i in xrange(x - size_x):
    for j in xrange(y - size_y):
        area = integral_image[i, j] + integral_image[i + size_x, j + size_y]
        area -= integral_image[i + size_x, j] + integral_image[i, j + size_y]
        if not area:
            hits += 1
if not hits:
    # no room left
    return None
# pick a location at random
cdef int goal = random_state.randint(0, hits)
hits = 0
for i in xrange(x - size_x):
    for j in xrange(y - size_y):
        area = integral_image[i, j] + integral_image[i + size_x, j + size_y]
        area -= integral_image[i + size_x, j] + integral_image[i, j + size_y]
        if not area:
            hits += 1
            if hits == goal:
return i, jDon't recognize this syntax as Python? It's actually Cython. Basically Python compiled to C to speed it up.
This avoids the problem of storing millions of points, but creates another by having to run the algorithm twice for each word.
Some further research led me to reservoir sampling algorithms. This category of algorithm is used to produce a uniform sample of a stream of elements without knowing how many elements exist beforehand.
// ...
let mut available_points = 0;
let mut random_point = None;

for y in 0..max_y {
    for x in 0..max_x {
        if region_is_empty(table, x, y, rect_width, rect_height) {
            let random_num = rng.generate_range(0..=available_points);

            if random_num == available_points {
                random_point = Some(Point { x: x as u32, y });
            }

            available_points += 1;
        }
    }
}

random_point
The algorithm works by keeping track of how many available points we've seen so far and using that as the probability of selecting the point in the current iteration.
For example, starting from the first available word the probability of selecting it is 1 / 1. The second point has a probability of 1 / 2, and so on. This guarantees that the sample is uniform.
So then, the performance question has gone from creating a vector with millions of elements each search, to running the algorithm twice, and finally to...?
How fast is an RNG?
The relevant part of this algorithm performance-wise is the fact that it has to generate a random number each time we find a space so that it can be considered as our chosen point. Can it really be faster?
On a Windows 10 laptop with a Ryzen 7 5700U processor, the nanorand crate that wcloud uses for random numbers can generate a million of them in about 4 milliseconds. The Stormtrooper wordcloud ends up needing 718,762 random numbers to be generated. The time it takes to find a spot for a word as well as running the SAT algorithm at the end of each placement dwarfs generating the random numbers, so I'm happy with the performance.
The result
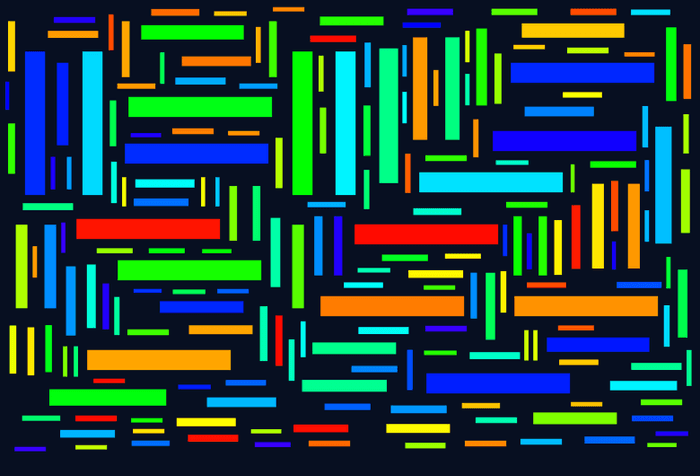
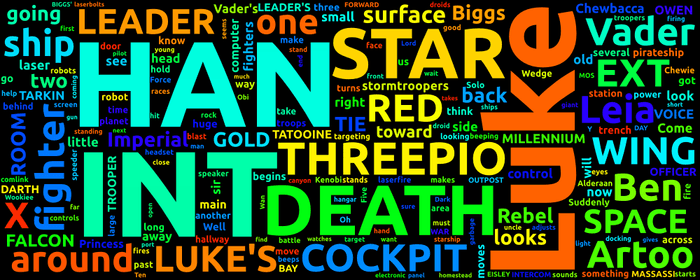
The words are now randomly placed.
Masking
Masking ended up being incredibly easy to implement. When a word is placed, the area each character takes up is replaced with white pixels to indicate that the space is taken. When using a mask, instead of using a solid black canvas to start with, wcloud uses the mask image as the starting canvas.
Performance
Summed-area tables
The algorithm that makes such a simple approach to placing words feasible in the first place is the summed-area table. There are already really great explantions of this online, so I'll just link to my favorite here: https://blog.demofox.org/2018/04/16/prefix-sums-and-summed-area-tables/.
Row-major and column-major
When first starting wcloud, I tried to translate the core space-finding Cython code line by line into Rust. After testing the performance of finding an empty spot for a word, I found that my code was much slower than the original Python implementation. Here's a simplified version of their implementation:
def find_space_for_word(unsigned int[:,:] integral_image, int word_width, int word_height):
    cdef int image_width = integral_image.shape[0]
    cdef int image_height = integral_image.shape[1]
    cdef int area, x, y

    for x in xrange(image_width - word_width):
        for y in xrange(image_height - word_height):
            top_left = integral_image[x, y]
            top_right = integral_image[x + word_width, y]
            bottom_left = integral_image[x, y + word_height]
            bottom_right = integral_image[x + word_width, y + word_height]

            area = top_left + bottom_right
            area -= top_right + bottom_left

            if not area:
                return x, y

return NoneNote that this is Cython and not regular Python. Cython is compiled to C code so it's much faster than regular Python.
This stumped me for a while. At first, I figured the bounds-checking that safe Rust does in order to eliminate out-of-bounds array access could be slowing things down, since arrays are indexed into for each iteration of the loop. Switching over to the unsafe get_unchecked method that ignores bounds-checking turned out even slower, so I kept looking.
Next, I decided to reimplement the function in C and measure the performance. To my surprise, it had the same speed limitation that I was experiencing in Rust!
My last idea was to investigate what kind of optimizations Cython was doing to the code. The C code that Cython compiles the .pyx file into was... hard to read to say the least. Thankfully it includes comments that provide a bit of context linking back to the original .pyx file:
for (__pyx_t_3 = 0; __pyx_t_3 < __pyx_t_2; __pyx_t_3+=1) {
__pyx_v_i = __pyx_t_3;
/* "wordcloud/query_integral_image.pyx":17
* # count how many possible locations
* for i in xrange(x - size_x):
* for j in xrange(y - size_y): # <<<<<<<<<<<<<<
* area = integral_image[i, j] + integral_image[i + size_x, j + size_y]
* area -= integral_image[i + size_x, j] + integral_image[i, j + size_y]
*/
__pyx_t_4 = (__pyx_v_y - __pyx_v_size_y);
__pyx_t_5 = __pyx_t_4;
for (__pyx_t_6 = 0; __pyx_t_6 < __pyx_t_5; __pyx_t_6+=1) {
__pyx_v_j = __pyx_t_6;
/* "wordcloud/query_integral_image.pyx":18
* for i in xrange(x - size_x):
* for j in xrange(y - size_y):
* area = integral_image[i, j] + integral_image[i + size_x, j + size_y] # <<<<<<<<<<<<<<
* area -= integral_image[i + size_x, j] + integral_image[i, j + size_y]
* if not area:
*/
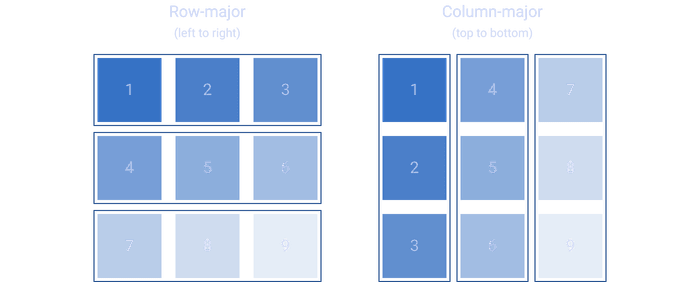
__pyx_t_7 = __pyx_v_i;After staring at the code for long enough I figured it out. Cython recognizes that the for loop can be optimized by swapping row iteration in the inner loop for column iteration.
By having the y variable incremented in the inner loop, we jump around in memory each iteration since the pixels of the image are stored one after another horizontally.
Days of trying to figure it out later, the solution ended up being a line-swap.
    # ...
    for y in xrange(image_height - word_height):        for x in xrange(image_width - word_width):            top_left = integral_image[x, y]

    # ...
For more information about these kinds of loop optimizations, check out the Wikipedia on row and column-major order.
Try it out
I've compiled wcloud to WASM and made a little generator website. Check it out here: https://isaackd.github.io/arcus
It's been a while since I looked at the code, and it isn't particularly hard to end up with a Rust panic (try entering just the letter a??), but I still think it's fun to mess around with and get some fun patterns.